Thursday, October 22, 2015

Halloween Makeup

Welp, my maternity leave is officially over. I have to go back to work next week. I really do love my job and love my co-workers, but if I could be a stay-at-home mom, I would. The only thing keeping me from bursting into tears is the fact that it's Halloween week, and at Sephora, that means a week dedicated to fun Halloween makeup. I'm really not a fan of Halloween; it's just not my thing, but I'm always up for a reason to play around with costume makeup.

Whether you're planning on looking cute this Halloween, or like something straight out of The Walking Dead, I have some tips and tricks to take your makeup to the next level.


 Clearly, zombie makeup is my favorite considering I've done it two years in a row. I'm more of a subtle zombie, I'll pass on the wounds. Last year on Classic Horror day, I created my first zombie look (left). I opened that day and one of our managers asked me to run across the hall to the coffee shop to grab her some coffee. Homeboy behind the counter kept on giving me strange looks but refused to address the issue that my face just wasn't right. It was entertaining.

If you're planning on spending Halloween dressed up as someone, or something, dead, you want to keep these points in mind. You want to make sure your face looks as sunken in as possible. Everyone knows all about the contouring trend that swept the beauty world this past year; creating shadows on the skin to manipulate or enhance your face shape. That is essentially what you're going to do here. In true contouring, you use an ashy, grey-toned brown to contour and then use a warm brown (bronzer) to add life and warmth to the skin. Throw out that bronzer step because we want to look like death! Use a grey, matte eyeshadow to heavily contour your cheekbones, and hollow out the eye sockets. You can also mix a deep purple and reddish-brown shadow together (always matte!) and apply to the eye sockets and around the nostrils for a more sickly look. In my looks, I used Anastasia's Sienna and Makeup Geek's Duchess for that step. Use a light hand here, you don't want too much color around your eyes. To keep the eyes dark, go all out with a black smokey eye. Don't worry about making it look perfectly blended, the more it looks like you got punched in the eyes, the better! I used a black gel eyeliner as a base and blended everything out with a matte black shadow. Keep your skin fair with little to no warmth, the dead do not have a killer tan! Finish off your look by lining and filling in your lips with black eyeliner. I added a deep purple lipstick in the very center of my lips for a little extra dimension. I'm obsessed with this one. This year, I wanted to add some fake blood around my mouth for a little something extra. I wasn't about to spend money at a special effects store on fake blood so I took some dark red lipstick, smeared it on my fingers, and then smeared it around my mouth before I put on my lipstick.


The ever popular mermaid. And for good reason. Who doesn't want to look like a mythical creature from the sea? I, myself, would love to be a mermaid. Except for the water part. I hate getting wet. I'll just sunbathe on a rock. 

This makeup look is super simple. I did a really easy eye look with purple and turquoise eyeshadow, pearlescent glitter and false lashes. I then took different shades of pink, purple, and turquoise eyeshadows and, again, contoured my face. Unlike the zombie look, go crazy with the shimmers. The more of a glow you have going on, the better. During this step, you want to make sure you're starting with the lightest shades first and blending the darker shades in as you go; it's always easier blending dark colors into light. You can also lay down a piece of fishnet before you place the eyeshadow on your face to create a scale-like appearance. If you choose to do this, I recommend putting down a white base first (something like this) as it will allow the scales to show up a lot better! Then it's time to get creative. Glue sequins, pearls, rhinestones, whatever you want, to your face using lash glue. Finish your look off with a fun lip color. I used Kat Von D's Coven lipstick with a hint of Bite Beauty's Violet in the center.


I was really feeling the colored contour, so I took inspiration from my mermaid look and created this Woodland Fairy look. The day of Halloween is the only day of the week we are allowed to ditch our not so flattering uniform and wear a costume. I wasn't about to spend an arm and a leg on a costume, so I threw on a camel colored top, black leggings, a black tutu, and a pair of boots and called it a Woodland Fairy costume. I threw some extension in my hair and braided in a few pieces of fake greenery I had laying around the apartment. 

For this makeup look, I created a dark green smokey eye with winged liner and false lashes. I used different shades of green to contour, again using a mixture of shimmer and matte shades. I started with light greens, blending in the darker greens as I progressed. I used a dark, forest green eyeshadow just in the hollows of my cheekbones for a little extra drama. For the lips, I wore a basic nude lipstick, and later in the day, ended up adding some glitter on top. I'm almost positive I used this glitter liner. Using something like a glitter liner on your lips will help to ensure the glitter stays on! Just wipe the liner on your finger and tap on your lips!

And there you have it! Three super easy Halloween makeup looks! If you recreate any of these looks, I want to see them! If you post them on Instagram, make sure you tag me (@jenna__anne). I'm looking forward to seeing what looks I come up with next week. Follow me on Instagram to see the results!

Monday, October 19, 2015

Lately on Instagram

I'm slightly obsessed with Instagram. Especially now that Aves is around, I love sharing the sweet little moments of our day with friends and family. Instagram, for me, has turned into a modern day baby book; a way to document Aves life. 

One of my favorite blog posts to read are those about Instagram pictures. I'm a visual person, so being able to look at pictures and reading a bit more about what is truly behind that picture is something I enjoy. It's a fun way to get to know a little bit more about a person.


Aves love reading time. We read to her a few times a day, during tummy time and before bed. Of course, she is still way too young to understand what we're reading to her, but it's important to stimulate your baby's mind with words. Justin was reading this Bible storybook to Aves. She loves it! The pictures capture her attention and she'll babble while you read it to her. It's adorable.


It's really rare that Justin has time off during the weekend. Since the organization he runs works with middle- and high school kids, he's busy during non-school hours -- evenings and weekends. They were in a transition time during their program and he had a Sunday free, so we spent some family time at a local apple orchard. We didn't pick any apples or pumpkins, but just spent time walking through the orchard. We did get an apple cider slush though. So good!


I'm not really into the whole Halloween thing. The thought of getting dressed up in a costume doesn't excite me as much as it did when I was younger (I'm more of a Christmas girl!). But, working at Sephora, Halloween season means an opportunity to do fun makeup. I'm always down for some zombie makeup. I spent some time transforming myself into a zombie the other day for a work project, so much fun. Keep an eye out for a blog post later this week. I'm going to share some tips and tricks for different Halloween makeup looks!


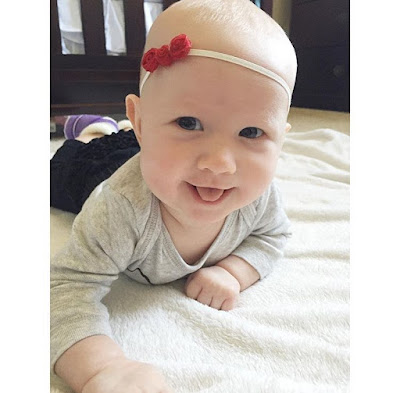
Every time I look at this picture, it makes me a little sad. As much as I love watching her grow and learn new things, I don't want her growing up too fast! To see how well she can hold her head up and how alert and smiley she is every day makes me equally proud and sad. It is crazy to think about how much she has grown in the last three months.


Again, another one of those pictures that makes me a little sad. We were gifted these pajamas for Avery and I've been in love with them since. I think they're so beautiful. They've been too big for her until recently. She's officially in three month clothes. Cue the tears!


We went out to dinner with Justin's business partner and his family the other day and Aves and I decided to match. How adorable is her navy blue puffer vest? I ended up changing her into a different vest before we left because once I put her in the carseat, the vest was creeping up super high and the zipper was rubbing against her face, but it was cute while it lasted.


Does this picture need an explanation? I don't think so. She's just too adorable.


My brother-in-laws came over for the big Michigan v Michigan State game, and I had to snap this picture. Shortly after I snapped this picture, hearts were broken. The phrase "I think I'm going to be sick" was on repeat. I think Aves took the loss a little easier than the boys, but she was clearly really into the game.


Our fur baby, Riley, thinks he runs this place. He's as stubborn and strong-willed as can be, but it's adorable when he tries to behave. After begging for a piece of bacon didn't end up in his favor, he laid down on the pillow next to me, and tried his hardest to act like an angel, hoping maybe then he would get a bacon. But poor Riley, he doesn't get human food, so no bacon for him!

If you're not already following my personal Instagram page, you should to keep up with my little family! Follow me at @jenna__anne.

Happy Monday! 

Friday, October 16, 2015

Avery's Nursery

As soon as I found out I was pregnant, I could not wait to start decorating the nursery. I had always imagined that it would be so much fun decorating a space for a little one. 

We live in a two bedroom apartment, which pre-baby, had plenty of space for the two of us. It's amazing how much space a seven pound baby takes up! Before Avery, our second bedroom was a guest bedroom, as well as, Justin's home office. Justin works from home for about half the day so it is important that he has a space of his own. It was a little tricky putting together a nursery in half of a small room, but we managed to make it work.

I knew regardless of if we were having a boy or a girl, that I wanted more of a neutral color palette for the nursery. Personally, I think it's absurd to spend money on big ticket baby items that are gender specific. I wanted to make sure that things like the crib, stroller and carseat had more of a neutral color, something classic, that we could use again, regardless of if our next child is a boy or a girl.


The walls of our apartment are already painted a golden cream sort of color, if that description even makes sense! I wanted to play off that that color with dark wood, creams and white with accents of gold and muted pink. 


I didn't waste any money on a crib set as I am all about that safe sleep. No comforter or bumpers for my babe! For the crib, we bought and registered for various fitted sheets, this ruffle crib skirt, and I usually rotate draping different blankets that were made by family and friends for Avery over the side. Avery is still sleeping in a bassinet in our bedroom, but when she transitions to sleeping in her crib at night, we'll make sure the blankets are put away.


When we move into a house, I would love to do an entire gallery wall in Avery's room, but with limited space, I stuck to a mini gallery. The 'A' initial, the gold print, and the gold sunburst were all found at Hobby Lobby. I stalked Hobby Lobby for ever just for that print, and when it finally went on sale, I was one happy lady. The butterfly picture is from Ikea. It was the very first item I bought for the nursery the weekend we found out we were having a girl.

I made the dreamcatcher mobile myself. It was super easy! All you need is an embroidery hoop, gold string, fishing wire, craft feathers, the paint color of your choice, and glitter. Aves loves it! When she's hanging out in her crib after a nap, she'll just stare and smile at it. 


I was really against a traditional changing table. For one, it would have taken up room we just don't have. But it is also one of those baby items I find unnecessary. You spend an arm and a leg on a changing table that you use for a short amount of time, and then what do you do with it? I loved the idea of getting a dresser with a changing table top and then creating my own little changing table station.

I found a wire wall organizer at Home Goods that I loved for a diaper caddy. It's super convenient and holds diapers perfectly. I put up a couple simple shelves that match the dresser and crib to hold random things like lotions, wipes, and diaper ointment. Putting up the smaller shelf was a bit of debacle and there may be a very large hole behind it, which is why I only put her moccasins on it. I'm pretty sure if I tried to put anything heavier on it, the whole wall would collapse. I found a few hooks that I put up to hold her headbands.

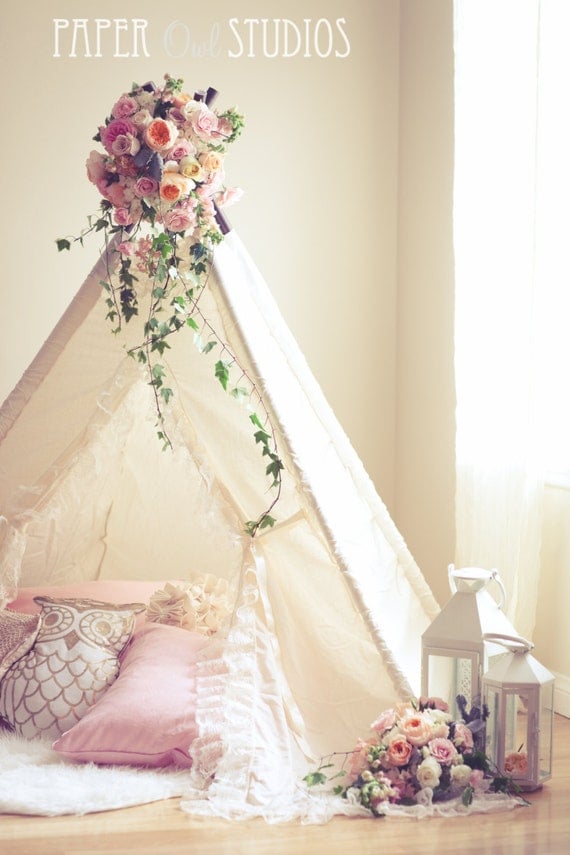
While it can get a little crowded and messy having Avery's nursery and Justin's office in the same room, it can be pretty nice. We spend a lot of time together as a family in that room; while Justin's working Avery and I will hang out on the floor, reading books or doing tummy time. However, I am looking forward to the day that we move out of this apartment into a home of our own. I have visions of creating a reading corner for Avery, filled with lots of books and a teepee with comfy pillows and blankets. I always wanted a little space growing up where I could get away and get lost in books. I can't wait to create something like that for Avery that she can grow into.

source
How absolutely beautiful is that teepee. It will be Avery's one day!

I had so much fun putting together Avery's nursery while I was pregnant, and I am even more excited to add to her room as she grows. It will be so fun to see how her little personality is reflected in her space.

Happy Friday, everyone!

Wednesday, October 14, 2015

Pumpkin Snickerdoodles

I love to bake.

Now that I have an almost 3 month old, baking is a whole lot harder. It's like she knows I'm trying to get something done and it is those moments she decides she wants to be held. She's lucky that I love holding her!

The other day while at the grocery store, I picked up a can of pumpkin puree to make these pumpkin chocolate chip muffins.


If you're a pumpkin lover like I am, you need to try this muffin recipe. The result is perfectly fluffy muffins! The pumpkin flavor isn't overwhelming, just perfection!

But back to real reason for this post. I had leftover pumpkin puree since the muffin recipe only calls for half a can. I'm always looking for a reason to pull out my KitchenAid mixer. Since we live in an apartment and our kitchen is big enough for a mouse, my poor KitchenAid mixer lives a sad, lonely life on the floor on the pantry. One day, I will have a kitchen big enough to proudly display it on the countertop!

What goes hand-in-hand with a KitchenAid mixer? Cookies, duh! I thought that the pumpkin puree would pair perfectly with the cinnamon sugar goodness of a snickerdoodle, so I took to my trusty sidekick, Pinterest, to search for some recipe inspiration. I came across a few different recipes and took a little bit of them all to create, in my opinion, the perfect pumpkin snickerdoodle cookie.


First, let's address the elephant in the room. This cookie looks a bit...deformed. But that's okay, who doesn't love some character? The real reason this cookie isn't very aesthetically pleasing is because it was the very last cookie. Justin and I may have devoured the rest before I remembered to take pictures. But the bottom line is, you really won't care what these cookies look like once you bite into it.

This pumpkin snickerdoodle recipe makes the softest, fluffiest cookies ever! The recipe yields 36 regular sized cookies, but I believe that bigger is better, so I made about 24 large cookies. Let's take a moment to think about the fact that Justin and I ate 24 cookies in about five day. I'm slightly ashamed, not really, but now realizing I should probably go on a diet. 

Try out the recipe and see for yourself. You won't be able to keep your hands off these!

Side note, you need this Market Roast candle from Target!

Pumpkin Snickerdoodle Cookies

Ingredients

3 1/4 cup all-purpose flour
3 1/2 tsp cornstarch
1 tsp baking soda
1/2 tsp baking powder
1/2 tsp salt
3/4 tsp ground cinnamon
1/2 tsp ground ginger
1/4 tsp ground nutmeg
1 cup granulated sugar
3/4 cup packed dark brown sugar
1 cup softened unsalted butter
1 egg yolk
1/2 can pumpkin puree
1 1/2 tsp vanilla extract
2 tsp lemon juice*

Cinnamon Sugar Coating

1/4 cup granulated sugar
1 1/2 tsp ground cinnamon

Directions

In a large mixing bowl, combine flour, cornstarch, baking soda, baking powder, salt, cinnamon, ginger, and nutmeg. Set aside.

In a KitchenAid mixer (or large bowl) cream together softened butter, granulated sugar and dark brown sugar until barely combined. You don't want to over-mix this step! Mix in egg yolk then pumpkin puree, vanilla extract, and lemon juice. 

With the mixer on low, slowly add in your flour mixture until completely combined. Once, combined, cover the mixing bowl with plastic wrap and refrigerate for an hour. This is very important! If you don't refrigerate your dough, it will make the next step very difficult!

Once your dough is chilled, mix together your cinnamon sugar coating. Scoop two heaping tablespoons of the batter out, roll into a ball, roll ball into the cinnamon sugar mixture until completely coated and place on an ungreased cookie sheet. Continue with remaining batter.

Bake in a 350 degree oven for 12-14 minutes. I baked mine for exactly 12 minutes and got cookies that were still slightly undercooked in the very center, exactly how I like my cookies! Allow cookies to cool on the baking sheet for five minutes, then remove onto a wire rack, or straight into your mouth. Whatever floats your boat. 

*Traditional snickerdoodle recipes call for cream of tartar, an acid, that is generally used in combination with baking soda to make baked goods rise. Many people say there isn't a good substitute for cream of tartar, but my high school home economics teacher was a boss and once recommended just using lemon juice. The acid in lemon juice will have the same effect as cream of tartar, and in my opinion, makes the snickerdoodles much more fluffy. If you have a recipe that calls for cream of tartar and you don't have any, simply use twice as much lemon juice as baking soda. For example, this recipe calls for 1 tsp of baking soda, so I used 2 tsp of lemon juice. Easy peasy!

If you try out this recipe, let me know what you think!

Enjoy!

Monday, October 12, 2015

Five Things Pregnancy Taught Me

Taken the day before my scheduled c-section 
I was one of those people who loved being pregnant. Even though I had a pretty rough first trimester, just knowing that I was growing a little human inside my body made up for all the time I spent hugging the toilet bowl. It's pretty incredible, the idea of creating and carrying a human in your body for nine months. If it doesn't make you believe that God is real, then I don't know what will.

Regardless of how much I loved pregnancy, there were plenty of...shall we say, surprises... that were nothing short of interesting to experience. All of you mamas out there know what I'm talking about. There's a whole slew of topics underneath the umbrella of pregnancy that no one tells you about. Some are not blog appropriate and those of you who have not experienced pregnancy will have to find out on your own, sorry! Here's a list of things I learned during pregnancy.

1. Morning sickness? I think you mean all day, every day sickness. At least this was true for me. I was nauseous all day, every day my first trimester. This was especially difficult working 8 hour shifts, constantly being on my feet. I remember standing at the front of the store, trying my hardest not to puke all over myself and watching random strangers walk past, wondering what it was like to be them, living a normal life without constant nausea. Dramatic much, Jenna? Also, I had a traumatic experience that will forever change the way I see spiral macaroni and cheese...

2. Just throw your modesty out the window. Pregnancy gives doctors, nurses, heck, maybe even the occasional medical student, the excuse the poke and prod in places you wish they just wouldn't. I went to an office that had several obstetricians on staff, and it seemed like no matter who I was seeing that day, they always had a medical student shadowing them. Fabulous! The more the merrier. And no, I will not scoot down the table a little more...

3. Feeling like a beached whale is a real thing. It's one of those pregnancy things that you hear, but I honestly wondered if it was true. Oh boy, is it true. It was that moment I was trying to stand up after taking a bath and realized I couldn't that I knew I had reached beached whale status. I've had better moments than when I had to call my husband into the bathroom to help me up. 

4. We need a king-sized bed. Imagine being eight months pregnant in June, sharing a queen sized bed with your six foot four inch husband, a huge body pillow, and your diva dog who thinks it is necessary to sleep on top of you. We might as well have been sleeping in the back of my Ford Fusion. There were plenty of times I tried to push my husband off of the bed.

5. Let's not forget that NO ONE tells you that you have to wear a diaper after you give birth. Yeah, thanks for that one everyone I know who has had a child. I had to find out from that website, The Bump, that you get to wear really cute mesh underwear and diaper sized pads after birth. Not to mention, you bleed for the next six weeks, so there's that. This is my good deed for the day, warning all of you yet to birth a child, you have this to look forward to. 

So, pregnancy isn't all sunshine and roses. Let's be honest, your body goes through some weird and downright disgusting changes, but there's a reason a lot of women go through it more than once. There is nothing like feeling your baby move around inside your belly and the emotions you feel when you hear your baby cry for the very first time is something that can't be put into words. Every nauseous second and awkward doctors appointment are worth it when you have that sweet baby in your arms. 


Thursday, October 8, 2015

Currently Stocked

Happy Thursday!

This will be a first of many 'Currently Stocked' posts. Here, I'll keep you updated on what is in stock in the store, any sales that might be going on, as well as any sneak peeks of newness coming soon! You're definitely going to want to keep up with these posts!

The Ivy & Grace Etsy Shop is still in its newborn stage and I cannot be more excited to see where it goes. My very first vision of the Ivy & Grace Shop came to me while I was pregnant with Avery. Originally, I wanted to start creating and selling baby leggings, because who doesn't love an adorable baby in leggings?! I quickly realized that if I wanted to make this a business, I should probably invest in a sewing machine because nobody has time for hand sewing baby leggings! I also need to refine my sewing skills a bit; I'm not quite Martha Stewart level just yet.  So, maybe baby leggings weren't the best idea...

Idea number two? Baby headbands! When I found out that we were having a girl, I went headband crazy. That's when I realized I could make those headbands I was buying, and voila, Ivy & Grace was born.

Pink and Green Floral Headband

I really enjoy being creative. I made my career makeup artistry and I enjoy using my hands to bring the visions I have in my head to life. 

Cream Floral Headband

My head is bursting with ideas for new headband designs! As soon as that little angel above wakes up from her nap, we will be heading to the store to find the perfect materials to create some new Fall/Winter bands. Make sure you follow our store Instagram (@ivyandgraceshop) because I may or may not be posting some sneak peeks!

 
1 // 2 // 3 // 4 // 5 // 6

You can find all of the headbands above in stock in the Ivy & Grace Etsy Shop! All of our headbands are one size fits all except for the White Lace Turban, in which you can select the size to fit your baby. Don't forget to use the code 2FOR12 to get two headbands ($14 value) for $12 + shipping!

Happy Shopping!

Tuesday, October 6, 2015

Welcome to Ivy & Grace

Well, hello! Welcome to the Ivy & Grace Blog; a place where you can get to know a little more about myself and my little family and a place where you can get some sneak peeks of upcoming newness to our Ivy & Grace Etsy Shop. Let me take some time to introduce myself...


 I'm Jenna! I'm a 20-something wife, mother, small business owner, and certified Sephora makeup artist. I was born and raised in Michigan, and although we currently live in Indiana, I will always be a Michigan girl at heart. While being a wife and mother are the most rewarding, I have a few other roles. I run the Ivy & Grace Etsy Shop where I sell handmade baby headbands. I love being creative and the shop is the perfect outlet for that. I've also been working at Sephora as a certified makeup artist since October of 2013 and I couldn't love my career more! Not only is Sephora an amazing company to work for, but I get the opportunity to express myself through the art of makeup and teach other women to do the same. And let's be honest, sometimes it's just fun to transform yourself into a zombie or a mermaid!


I met my husband Justin in college while we were on a cross-cultural trip to Guatemala. We went to a small, Christian university but had to leave the country to meet, go figure! We got married in September of 2013 and moved to Indiana soon after. Justin runs an elite travel baseball organization and training facility here in Northern Indiana. He rarely takes life too seriously and is always making me laugh. I can honestly say that I married my best friend. 


 Our most recent adventure? Parenthood. Our sweet little girl, Avery, was born late July of 2015. I had planned on a natural birth, but found out at 38 weeks this little princess was breech. So cesarean section it was! I was extremely blessed with an amazing doctor and a very easy recovery and was feeling back to normal just a few days post-surgery! Motherhood has been nothing short of amazing. I have always known that I wanted to be a mom, but I cannot explain just how much it has made me feel whole. At the time of writing this, Avery is now a thriving and healthy 2 month old. It's been so much fun to watch her learn and grow, and let me tell you, this little girl is loved so very much. Avery is also our Ivy & Grace headband model, so you'll get to see much more of her!

And there you have it, just a little bit about me. I hope you will come back and continue to keep up with our little family and the Ivy & Grace Shop. I am an Instagram fanatic so you should probably follow me on both our shop Instagram (@ivyandgraceshop) and my personal Instagram (@jenna__anne). Thanks for reading!